BakingHalloweenKids friendlyRecipes

Pumpkin Cookies by ILoveCooking

zero Cook
Scroll to recipe

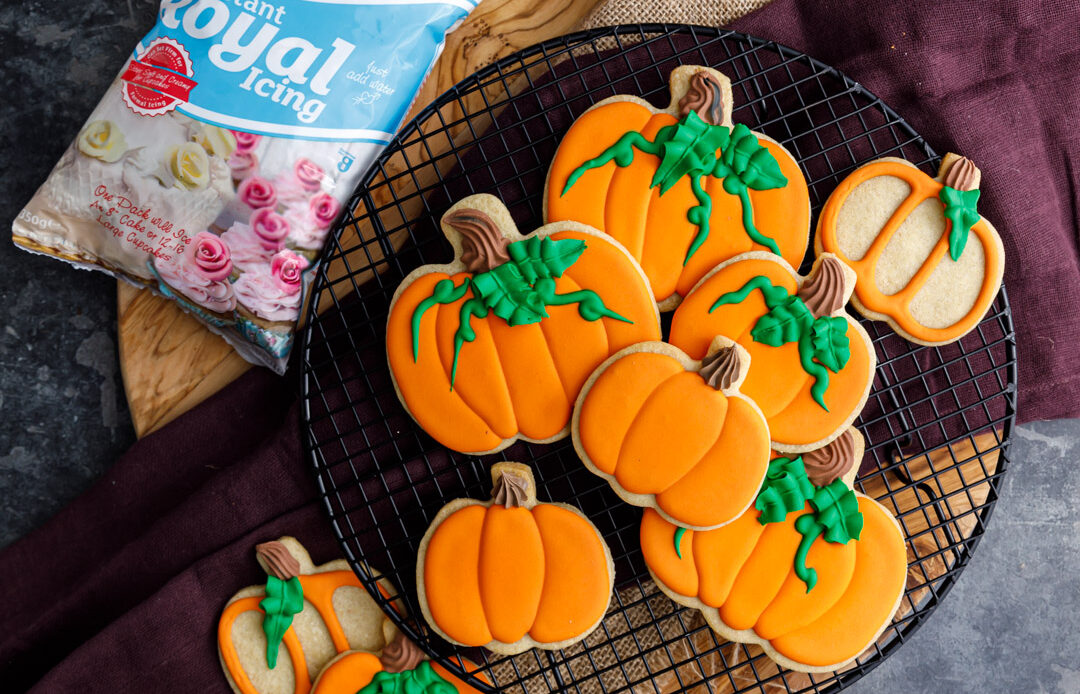
These cute biscuits – made with love by ILoveCooking and featuring Gem Royal Instant Icing – are fun to make when the leaves start to turn and spooky season is near! For the cookies, their No-Spread Sugar Cookie recipe is perfect as they won’t spread while baking, so you always have perfect little pumpkins. Feel free to add cinnamon, nutmeg and ginger spices to the biscuit dough for extra warmth. These do require a bit of time as you’ll need to leave the royal icing to set in stages, so plan to start decorating early in the day, or even over two days. We’ve used instant royal icing powder to make the process that little bit easier.

WATCH THIS STEP-BY-STEP VIDEO CREATED BY ILOVECOOKING TO SHOW YOU HOW TO DECORATE THESE GORGEOUS COOKIES

FORTHE No-Spread Sugar Cookie recipe, CLICK HERE!

Enjoy and share your creations with us by tagging us on Social Media using #GemBakes. Find us on InstagramFacebook and Youtube!

Pumpkin Cookies

agnesgempackfoods-ie
prep time
1-2h
cooking time
zero
servings
20

Equipment

Ingredients

  • For the royal icing:

  • 1x 350g bag instant royal icing

  • 60ml warm water, plus extra

  • Various gel food colouring (orange, brown, green)

Instructions

1
Pour 60ml warm water into a large bowl then add the instant royal icing. Starting on a low speed then increasing as you go, whisk with an electric hand held or stand mixer for about 5 minutes.
2
For the stems, scoop out a spoonful of icing and place in a small bowl. For the leaves (optional), scoop out another spoonful into a separate bowl.
3
Spoon the brown icing into a piping bag fitted with a small star tip, set aside. If decorating with leaves, spoon the green icing into a piping bag fitted with a leaf tip, set aside.
4
To the remaining icing, start mixing again and add more water, 1 tsp at a time, until you reach a 15 second consistency. This is when you fold the icing on itself with a spatula or spoon and it takes about 15 seconds for the icing to meld into itself.
5
If you will be decorating with vines, remove a spoonful and colour with green, spoon into a piping bag fitted with a small plain icing tip, set aside
6
Colour the remaining icing orange with gel food colour. Tip: Sometimes adding colour can make the icing thicken up, this is from continued mixing, so add a little more water if needed, though it’s best to be on the thicker side rather than thin if you’re not confident with royal icing.
7
Spoon into a large piping bag fitted with a small plain piping tip, set aside.
8
Stage 1: To start the pumpkins, using the orange royal icing, pipe the outline of a moon or bean on the one side of the biscuit, following the outside of the biscuit as a guide for the shape. Fill the shape with more icing. Then do a reverse moon or bean on the other side of the biscuit, filling in the shape with more icing.
9
Use a toothpick to spread the icing into any gaps in the shapes, then give the cookie a good shake from left to right so that the icing settles to a smooth surface. Tip: After each cookie, clean the tip of the icing bag & toothpick with the kitchen towel.
10
If decorating larger pumpkin cookies that will have more segments, along with the side moons/bean shapes, you can also do a thin oval in the centre.
11
Once all the cookies have been done, leave them to air-dry until they’re touch dry, this is when the surface no longer looks shiny and the icing is dry to a light touch. Tip: This can take longer if the weather is humid. If your oven has a bulb-only setting where there is no heat but the fan runs, you can pop the cookies on their trays in the oven to help speed up drying.
12
Stage 2: Using the orange icing, fill in the missing segments on your pumpkins by piping an outline then filling in the shape. Use the toothpick to spread the icing to fill any gaps, and give a shake to help the icing settle. (If decorating larger cookies with more segments, fill in the two missing segments in the gaps).
13
Leave to air-dry until touch-dry.
14
Stage 3: Using the thick brown icing, pipe a stem on each pumpkin.
15
If you’re doing vines and leaves, then pipe squiggly lines with the thinner green icing for vines, and the thick green icing for leaves.
16
Leave cookies to air-dry overnight.
17
Store in airtight containers at room temperature.
18
If you wanted to make these particularly spooky, you could also use black icing to pipe eyes and a mouth to make these into carved pumpkins!

Leave a Reply

Your email address will not be published. Required fields are marked *

×
BakingHalloweenKids friendlyRecipes

Spider Web Florentine Biscuits

10 - 15 mins Cook